User interfaces (UIs) are essential in modern software development, enabling users to interact with applications seamlessly. Tkinter, a powerful Python library, provides an intuitive and flexible framework for creating GUI applications. In this detailed blog, we will explore the process of building user interfaces using Tkinter, covering important concepts, key widgets, layout management, event handling, and more. Along the way, we will provide comprehensive code examples to help you understand and apply the concepts effectively. Let’s dive in!
- Installing and Importing Tkinter
- Creating a Basic Window with Tkinter
- Running the Tkinter Event Loop
- Essential Tkinter Widgets
- Example
Installing and Importing Tkinter
Tkinter is a standard Python library, which means it is typically included in most Python installations. However, if you don’t have Tkinter installed or you need to ensure you have the latest version, you can follow these steps:
Step 1: Check if Tkinter is installed To check if Tkinter is already installed on your system, open a Python shell or terminal and enter the following command:
import tkinter
If Tkinter is installed, the import statement will execute without any errors. If you receive an error message, it means Tkinter is not installed, and you need to proceed to the next step.
Step 2: Install Tkinter (if needed) To install Tkinter, you can use the package manager that corresponds to your operating system:
For Linux (Debian/Ubuntu): Open a terminal and run the following command:
sudo apt-get install python3-tk
For macOS (Homebrew): Open a terminal and run the following command:
brew install python-tkFor Windows (pip): Open a command prompt and run the following command:
pip install tkinterStep 3: Import Tkinter Once Tkinter is installed, you can import it into your Python script by adding the following line at the beginning of your code:
import tkinter as tkAlternatively, you can import it without an alias:
import tkinterBy importing Tkinter, you can access all the classes and functions provided by the library.
That’s it! You have successfully installed and imported Tkinter in your Python environment. Now you can start building user interfaces using Tkinter.
Creating a Basic Window with Tkinter
To get started with Tkinter, you’ll need to create a basic window as the foundation of your user interface. Here’s how you can create a simple window using Tkinter in Python:
import tkinter as tk

# Create the main window
window = tk.Tk()

# Set the window title
window.title("My Tkinter Window")

# Set the window dimensions
window.geometry("400x300")

# Run the main event loop
window.mainloop()
Let’s break down the code:
- First, we import the
tkintermodule and alias it astkfor convenience. - We create the main window by calling
tk.Tk(), which initializes a Tkinter object representing the window. - Next, we set the title of the window using the
title()method. In this example, we set it to “My Tkinter Window”. - We set the dimensions of the window using the
geometry()method. The argument “400×300” specifies a width of 400 pixels and a height of 300 pixels. - Finally, we start the main event loop by calling the
mainloop()method. This loop listens for user interactions and keeps the window open until it is closed.
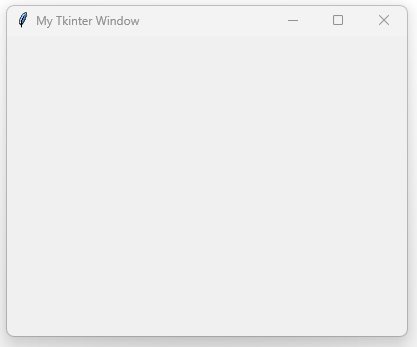
When you run this code, you should see a basic window with the specified dimensions and title. You can resize the window, move it around, and close it using the window’s standard controls. Feel free to customize the window title and dimensions according to your requirements. This simple window serves as the foundation for adding various widgets and building your user interface using Tkinter.
Running the Tkinter Event Loop
Once you have created a basic window using Tkinter, you need to run the main event loop to handle user interactions and keep the window responsive. The event loop listens for events such as button clicks, keyboard input, and window resizing. Here’s how you can run the Tkinter event loop:
import tkinter as tk

# Create the main window
window = tk.Tk()

# Set the window title and dimensions (if desired)

# Add your widgets and UI components here

# Run the main event loop
window.mainloop()
To run the event loop, you simply call the mainloop() method on the Tkinter window object. This method starts the event loop and keeps the window open until it is closed by the user.
Here are some key points to remember:
- It’s important to place any code related to your UI components, such as widget creation and configuration, between creating the window and calling
mainloop(). This ensures that the UI is set up before the event loop starts. - The event loop continuously checks for user input and updates the UI accordingly. It handles events such as button clicks, key presses, mouse movements, and more.
- Any code written after the
mainloop()call will not execute until the window is closed. Therefore, it’s common to place themainloop()call at the end of your script.
By running the main event loop, your Tkinter window will stay open, allowing users to interact with your user interface. You can add widgets, bind event handlers, and create dynamic functionality within the event loop to create a fully functional GUI application.
Remember to close the Tkinter window gracefully when your application is complete or when the desired condition is met. You can use methods like destroy() to close the window programmatically.
window.destroy()That’s it! You’re now ready to create interactive user interfaces using Tkinter and run the event loop to handle user interactions in your Python applications.
Essential Tkinter Widgets
Tkinter provides a wide range of widgets that allow you to create various UI components for your Python applications. Here are some essential Tkinter widgets that you can use to build your user interface:
Labels
Labels are used to display static or dynamic text in your UI.
import tkinter as tk

window = tk.Tk()

# Create a label with static text
static_label = tk.Label(window, text="Hello, Tkinter!")

# Create a label with dynamic text
dynamic_text = tk.StringVar()
dynamic_label = tk.Label(window, textvariable=dynamic_text)

static_label.pack()
dynamic_label.pack()

window.mainloop()
Buttons
Buttons enable users to trigger actions or events in response to a click.
import tkinter as tk

window = tk.Tk()

def button_clicked():
    print("Button clicked!")

# Create a button
button = tk.Button(window, text="Click me!", command=button_clicked)
button.pack()

window.mainloop()
Entry Fields
Entry fields allow users to input text or data.
import tkinter as tk

window = tk.Tk()

def submit_button_clicked():
    user_input = entry.get()
    print("User entered:", user_input)

entry = tk.Entry(window)
submit_button = tk.Button(window, text="Submit", command=submit_button_clicked)

entry.pack()
submit_button.pack()

window.mainloop()
Checkboxes and Radio Buttons
Checkboxes allow users to select multiple options, while radio buttons enable exclusive selection.
import tkinter as tk

window = tk.Tk()

checkbox_var1 = tk.IntVar()
checkbox_var2 = tk.IntVar()
checkbox1 = tk.Checkbutton(window, text="Option 1", variable=checkbox_var1)
checkbox2 = tk.Checkbutton(window, text="Option 2", variable=checkbox_var2)

radio_var = tk.StringVar()
radio1 = tk.Radiobutton(window, text="Option 1", variable=radio_var, value="option1")
radio2 = tk.Radiobutton(window, text="Option 2", variable=radio_var, value="option2")

checkbox1.pack()
checkbox2.pack()
radio1.pack()
radio2.pack()

window.mainloop()
Dropdown Menus
Dropdown menus provide a list of options for users to select from.
import tkinter as tk
from tkinter import ttk

window = tk.Tk()

def menu_selection_changed(event):
    selected_option = dropdown_var.get()
    print("Selected option:", selected_option)

dropdown_var = tk.StringVar()
dropdown = ttk.Combobox(window, textvariable=dropdown_var)
dropdown['values'] = ('Option 1', 'Option 2', 'Option 3')
dropdown.bind('<<ComboboxSelected>>', menu_selection_changed)

dropdown.pack()

window.mainloop()
Example
import tkinter as tk
from tkinter import ttk

def button_click():
    print("Button clicked!")

def checkbox_state():
    print("Checkbox state:", checkbox_var.get())

def radio_selection():
    print("Selected radio button:", radio_var.get())

def dropdown_selection(event):
    selected_option = dropdown_var.get()
    print("Selected option:", selected_option)

window = tk.Tk()
window.title("Tkinter Widgets Example")

# Label
label = tk.Label(window, text="Hello, Tkinter!")
label.pack()

# Button
button = tk.Button(window, text="Click Me", command=button_click)
button.pack()

# Checkbox
checkbox_var = tk.IntVar()
checkbox = tk.Checkbutton(window, text="Check me", variable=checkbox_var, command=checkbox_state)
checkbox.pack()

# Radio Buttons
radio_var = tk.StringVar()
radio_button1 = tk.Radiobutton(window, text="Option 1", variable=radio_var, value="option1", command=radio_selection)
radio_button2 = tk.Radiobutton(window, text="Option 2", variable=radio_var, value="option2", command=radio_selection)
radio_button1.pack()
radio_button2.pack()

# Entry Field
entry = tk.Entry(window)
entry.pack()

# Dropdown Menu
dropdown_var = tk.StringVar()
dropdown = ttk.Combobox(window, textvariable=dropdown_var)
dropdown['values'] = ('Option 1', 'Option 2', 'Option 3')
dropdown.bind('<<ComboboxSelected>>', dropdown_selection)
dropdown.pack()

window.mainloop()
Output:

Conclusion:
Tkinter is a versatile library for building user interfaces in Python. In this blog, we covered the fundamentals of Tkinter, and some essential widgets. These are just a few examples of essential Tkinter widgets. By combining these widgets and configuring their properties, you can create a wide variety of user interfaces tailored to your application’s needs.With the help of detailed examples, you can now confidently create interactive and visually appealing UIs using Tkinter in your Python projects. Happy building your UI!
If you need aditional explanation on some Tkinter feature, please do leave a comment.


Leave a Reply